
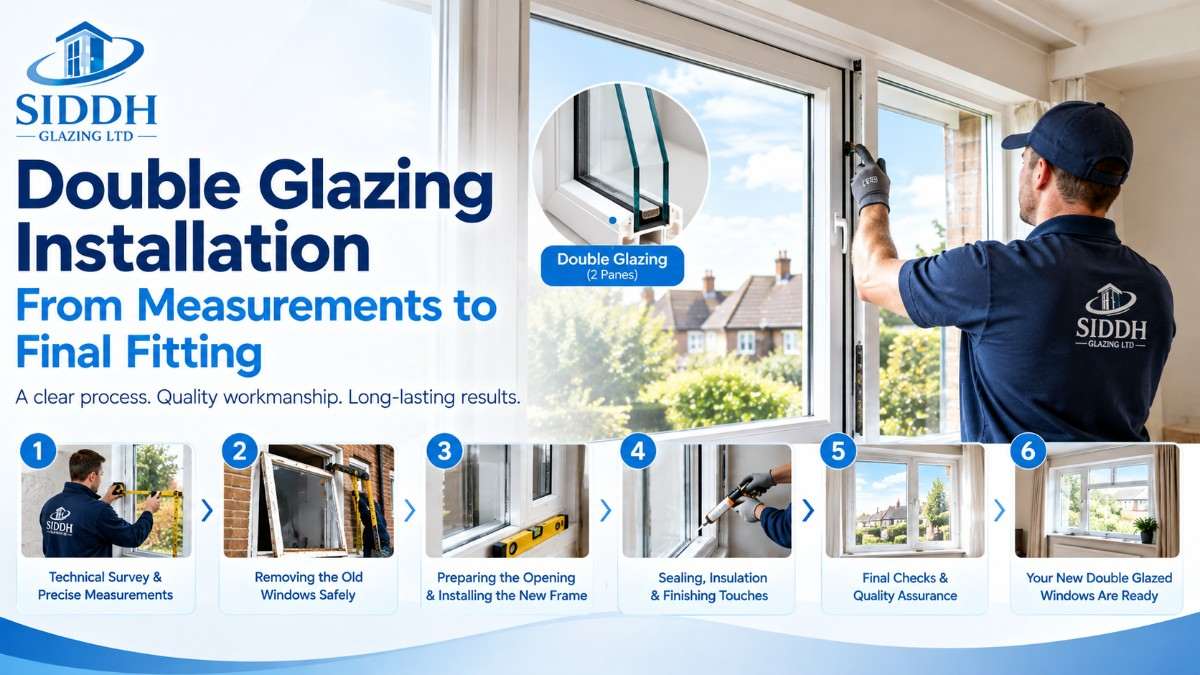
A window may look simple once it is in place, but what happens behind the frame can make all the difference. Double glazing installation involves much more than fitting new glass and frames. From precise measurements and careful preparation to secure fixing and effective sealing, every stage can affect how well your windows perform for years to come.
For homeowners in London and Essex, Siddh Glazing brings more than 15 years of experience to this process. Its in-house team follows a structured approach, from the initial technical survey through to fitting, finishing and final handover. This guide takes you through each stage, so you know what to expect from a professional double glazing installation.
What Double Glazing Installation Actually Involves
Double glazing means two panes of glass separated by a sealed gap, usually filled with argon or another inert gas. This construction increases the insulation value of a window by up to five times compared with a single pane. The installation process is far more than swapping glass; it includes removing old frames, preparing the openings, squaring and levelling new frames, sealing every edge, and finishing both inside and out.
When you choose Siddh Glazing, this work is handled by an in-house team, not subcontracted crews. That matters because the most common installation faults come from rushed measuring, poor alignment, and skipped sealing.
Inside each sealed unit, a spacer bar keeps the two panes apart and contains a desiccant that absorbs residual moisture. High-performance units often use a warm-edge spacer to reduce heat loss at the glass edge. The frame itself must include drainage channels to let rainwater escape and trickle vents to maintain background ventilation. When the installation is done correctly, these details work together to prevent condensation between the panes and inside the room.
Step 1: Technical Survey and Precise Measurements
Every proper double glazing installation starts with a technical survey. A surveyor visits your home, inspects the existing windows, checks the condition of the surrounding brickwork and lintels, and measures each opening in multiple places. Measurements are taken for width at the top, middle, and bottom, and height at left, centre, and right. This ensures the manufactured frames fit the actual opening, not just the old window.
Beyond the raw dimensions, the surveyor will note whether the existing cill is level, whether the reveals are square, and whether there is any sign of damp or rot in the surrounding timber. In older London and Essex properties, it is common to find brickwork that has shifted slightly over decades, so the surveyor may recommend remedial work before new frames are fitted. Lintels above the window are checked for cracks or sagging. If a lintel has failed, it must be replaced before the new window goes in, otherwise the frame could be put under uneven load and warp over time.
Digital measuring tools and laser levels are now standard on Siddh Glazing surveys. These devices capture the opening to within a millimetre and feed the data directly into the manufacturing software. That reduces the risk of transcription errors and ensures the new frames are made to the exact size of the aperture, not simply copied from the old window. The surveyor will also confirm your choice of style, glass type, handle finish, and any security upgrades at this stage, so the order is locked before production begins.
As a homeowner, you can help the survey go smoothly by clearing furniture away from the windows, removing curtains or blinds if possible, and making sure the surveyor has access to both the inside and outside of each opening. It is also worth telling the surveyor about any known issues, such as drafts, sticking sashes, or condensation, because these details can influence the specification of the replacement unit.
Step 2: Removing the Old Windows Safely
On installation day, the Siddh Glazing team arrives with all the new frames and glass, and starts by protecting the areas around each window. Dust sheets go down over floors and furniture, and the immediate working area is sealed off if necessary. The old window is then carefully dismantled; opening sashes are removed first, followed by the fixed frame. The installers cut through any fixings and ease the frame out of the aperture, taking care not to damage the surrounding plaster or brickwork. Any broken glass is taken away in a sealed container.
Once the old frame is out, the team inspects the exposed opening. This is often the point where hidden problems come to light, such as rotten timber lintels, loose brickwork, or failed cavity closers. If any of these issues appear, the installers will stop and discuss the options with you before proceeding. In many cases, minor repairs can be done on the spot, such as replacing a small piece of rotten timber or packing a loose brick. For more serious structural defects, the team may recommend a specialist before the new window is fitted.
Step 3: Preparing the Opening and Structural Checks
Before the new frame goes in, the aperture is cleaned and made good. Loose mortar is removed, any high spots are ground down, and the cill is checked for level. If the cill is not level, a new one may be laid or a packer system used to create a solid base. The reveals are also checked for square; if they are significantly out, the frame can be packed and adjusted later, but the surveyor will have noted this and ordered the frame with appropriate allowances.
In some cases, the existing lintel may need attention. A cracked or sagging lintel cannot support the masonry above properly, and installing a new window under it would transfer load onto the frame, causing it to bow and eventually fail. Siddh Glazing installers are trained to recognise the signs of lintel failure and will recommend replacement before fitting. This is not a common occurrence, but when it does happen, it is better to address it before the new window is locked in.
Damp proof courses and cavity closers are also checked at this stage. If the original window was fitted without proper closers, heat can bypass the frame and cause cold spots. The team will fit new cavity closers if needed and ensure that the damp proof course is intact around the aperture.
Step 4: Fitting and Fixing the New Frame
The new frame is lifted into the prepared opening and temporarily held in place with packers. The installers then level it vertically and horizontally using a spirit level, and check that the diagonal measurements are equal to confirm the frame is square. Once the frame is perfectly positioned, it is fixed to the surrounding masonry with heavy-duty screws or frame anchors. The number and position of fixings follow the manufacturer’s specification and building regulations, typically every 600mm around the perimeter and within 150mm of each corner.
Packers are used at the fixing points to prevent the frame from distorting when the screws are tightened. Over-tightening is a common cause of bowed frames and poor operation, so Siddh Glazing installers use torque-limited drivers to apply the correct pressure. After the frame is fixed, the gap between the frame and the masonry is filled with expanding foam insulation. This foam seals air leaks, provides additional insulation, and helps lock the frame in place. A low-expansion foam is used to avoid pushing the frame out of line.
At this point, the frame is secure, but the glass is not yet installed. The team will check the frame’s operation one more time before glazing, ensuring all moving parts work smoothly and the locking points align.
Step 5: Installing the Glass and Sealing the Unit
The double-glazed units are lifted into the frames with suction cups to avoid strain and to keep the glass clean. Each unit is seated on setting blocks at the bottom and held in place with glazing beads or gaskets, depending on the frame design. The beads are tapped in gently, making sure not to pinch the glass or damage the seal. For externally glazed frames, a continuous bead of low-modulus silicone is applied around the outside of the glass to create a weatherproof seal. For internally glazed frames, the external seal is usually a gasket that compresses when the bead is fitted.
The installer then checks that the drainage slots in the frame are clear and that any trickle vents are open and functioning. These small details are critical because trapped water inside the frame can lead to rot, frost damage, and failure of the sealed unit. Finally, the glass is cleaned both inside and out, and any protective film is removed.
Step 6: Internal Finishing and Making Good
After the window is glazed and sealed, the team turns to the internal finish. If any plaster was disturbed during removal, it is repaired. New internal trims or architraves are fitted where needed, and the gap between the frame and the plaster is filled with decorator’s caulk for a clean line. Window boards are replaced or reinstalled if they were removed, and any exposed fixings are covered with screw caps that match the frame colour.
The team then cleans the whole area, removing all debris, old frames, and packaging from your property. Siddh Glazing takes responsibility for disposing of the old windows and glass in line with environmental regulations. Your home is left as tidy as it was found, with only the new windows showing the work that was done.
Step 7: Final Inspection and Handover
The last step is a thorough inspection of every window. The installer opens and closes each sash, locks and unlocks it, and checks that the drainage is working. They look for any gaps in the sealant, any stiffness in the hinges, or any scratches on the glass or frames. Only when every window passes this check does the team consider the job complete.
Finally, the lead installer walks you through the operation of your new windows, explains the locking mechanisms, and shows you how to clean and maintain them. You will receive a handover pack that includes the warranty details, care instructions, and any guarantees from the glass and frame manufacturers. Siddh Glazing also registers the installation with the appropriate bodies, such as FENSA or CERTASS, so you have a certificate of compliance for building regulations.
Wrapping it up!
The installation of double glazing is a detailed process where every stage contributes to the performance, durability, and finish of your new windows. From accurate measurements and careful preparation to precise fitting and final checks, professional workmanship makes all the difference. By choosing an experienced installer and understanding what the process involves, you can enjoy better insulation, security, and comfort, with confidence that your windows are built to perform for years.
Frequently asked questions
How long does a typical double glazing installation take?
Most installations for a typical three-bedroom home take one to two days, but this depends on the number of windows and the condition of the existing frames.
What happens during the technical survey before installation?
A surveyor inspects the existing windows, checks the surrounding brickwork and lintels, and measures each opening at multiple points including width at top, middle and bottom, and height at left, centre and right. Digital measuring tools and laser levels are used to capture the opening to within a millimetre.
What if hidden problems are discovered after old windows are removed?
If issues such as rotten timber lintels, loose brickwork or failed cavity closers appear, installers stop and discuss the options with you. Minor repairs can often be done on the spot, but serious structural defects may require a specialist before the new window is fitted.
How is the new frame secured in the opening?
The frame is held with packers, levelled and squared, then fixed to the surrounding masonry with heavy-duty screws or frame anchors typically every 600mm around the perimeter and within 150mm of each corner. Low-expansion foam is used to fill the gap between the frame and masonry.
What happens at final inspection and handover?
Every window is opened, closed, locked and unlocked, and checked for drainage, sealant gaps, hinge stiffness or scratches. The lead installer explains operation, locking and maintenance, and provides a handover pack with warranty details, care instructions and guarantees, with the installation registered with FENSA or CERTASS.